RapidStudio's Tip 6: Understanding Bleed in print
Steven Hook / 1 August 2024

Creating a beautiful photobook of your holiday memories is exciting, but it can be frustrating if your images don't come out as expected. Let's explore two important concepts that will help you create stunning, professional-looking photobooks: bleed and margins.
What is Bleed?
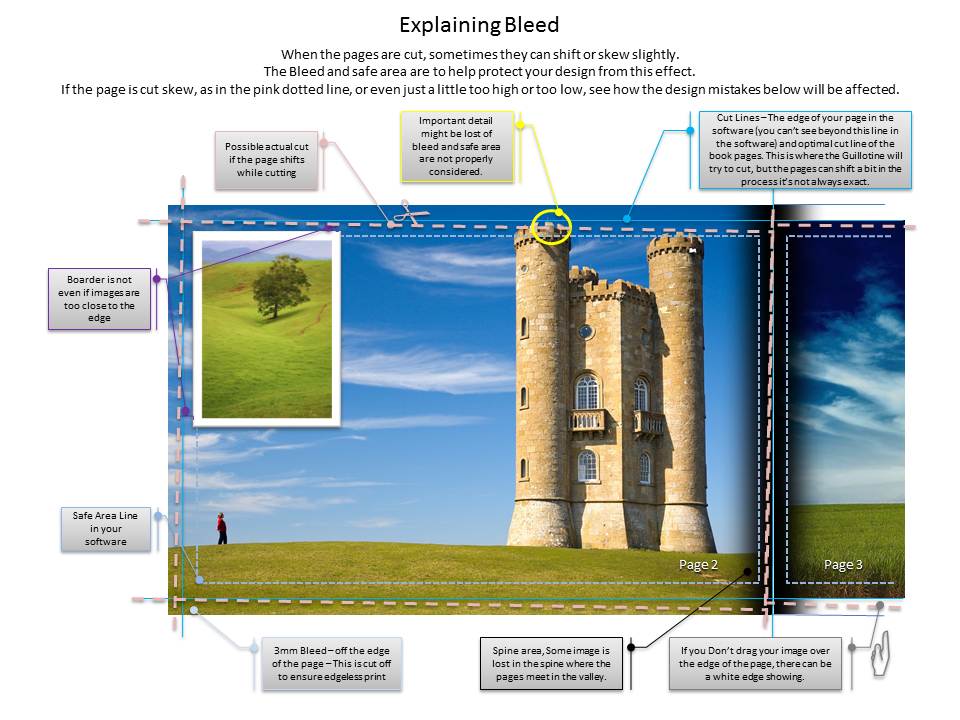
Bleed is extra image area that extends beyond the edge of your page. In our photobook creation process, we use a 4mm bleed. This means your images should extend 4mm beyond the page edge to ensure they go right to the edge after the book is trimmed.
Why is Bleed Important?
Bleed prevents white edges from appearing on your pages. It allows for slight variations in cutting without leaving unprinted borders around your images.

In this image, you can see examples of pages with and without bleed. The page on the left will bleed off the edge, while the page on the right will have a white border. Notice how the images extend beyond the page edge on the left to ensure full coverage.
Understanding Margins
While bleed extends beyond the page edge, margins are safe areas inside the page. Our online editor uses a 10mm margin line. Keeping important elements of your photos within this margin ensures they won't be too close to the edge or get lost in the binding of your book.
Using Our Online Editor
Our online photobook editor uses color-coded lines to help you create perfect layouts:
- Red line: This is the cut line. Anything beyond this line is in the bleed area and may be trimmed off.
- Green line: This is the margin line, 10mm inside the cut line. Keeping your main image elements inside this line will create a nice, even border in your final book.

This detailed image illustrates the concepts of bleed, cut lines, and safe areas. The outer red outline represents the bleed area, the solid black line is the cut line, and the inner dotted line shows the safe area or margin. Notice how the orange extends into the bleed area, ensuring it reaches the edge of the page after trimming.
Tips for Perfect Photobook Pages
- For edge-to-edge photos, extend your image past the red line into the bleed area.
- Keep faces and important details inside the green margin line.
- For bordered images, align them with the green margin line for a consistent look.
- Be mindful of the spine area in double-page spreads to avoid losing parts of your image in the book's binding.
By understanding bleed and margins, and using the helpful guides in our online editor, you can ensure your holiday memories are displayed beautifully in your photobook, with no unexpected cropping or awkward borders.